From the left navigation, select Text under Messages Center.
To send an single message
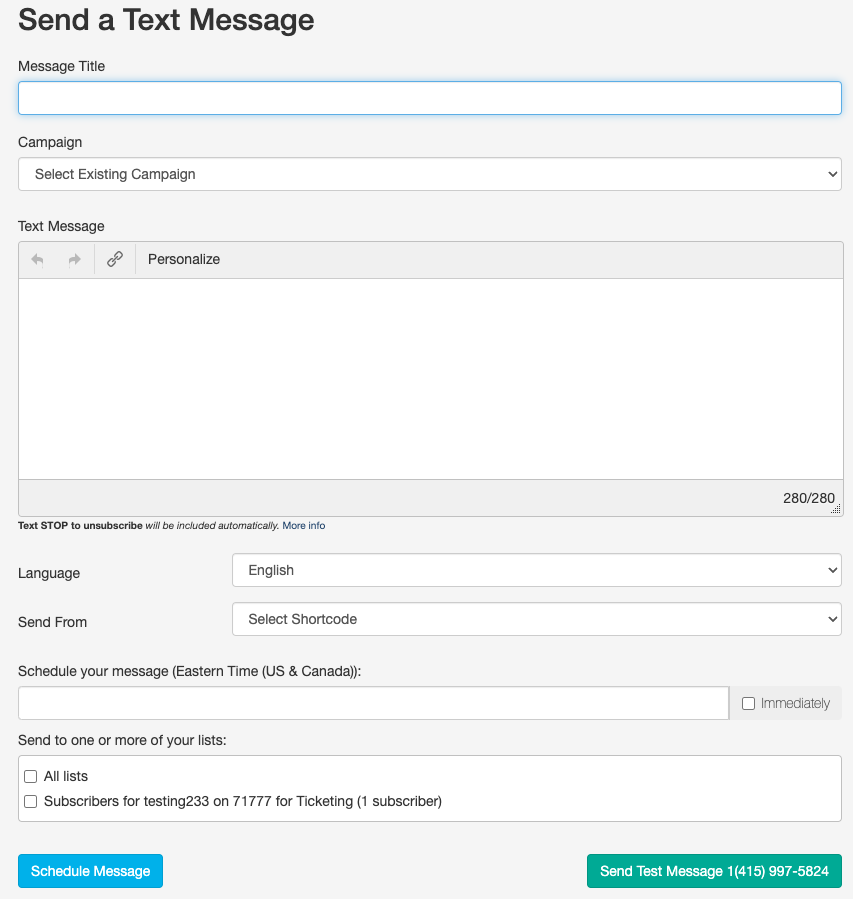
Message Title: This is an internal title, never seen by your message recipients, so you can easily identify messages in your Outbox, which is where all your sent messages are archived. For more on tracking messages, click here.
Campaign: Select an existing Campaign. The Campaign is meant to organize real-time reporting. It is also used as the title and text for the link used when a donor shares about your organization to Facebook from the Thank You Page.
Text Message: Next, type the text message and include any URL links to a video or website in the text box. Remember to identify your organization in the body of the message. You have 134 characters for your message that you can see the remaining characters in the lower right of the Text Message section.
It is recommended to connect with your supporters by telling your story in your texts before your ask for a donation. Organizations with the best texting to donation ratios frequently text 2-3 messages before asking for a donation.
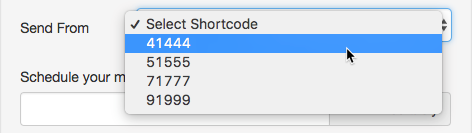
Send from: Select the shortcode you wish to send the message from. A short code is the five digit specialized phone number used in conjunction with a keyword.
For best practices, this should match the shortcode supporters used so your message appears in the same message conversation on their phone. For example, if they have only just been subscribed, use the SMS Subscription shortcode, 51555. If they have pledged or donated, use the Text to Donate shortcode they used, either 41444 or 91999.
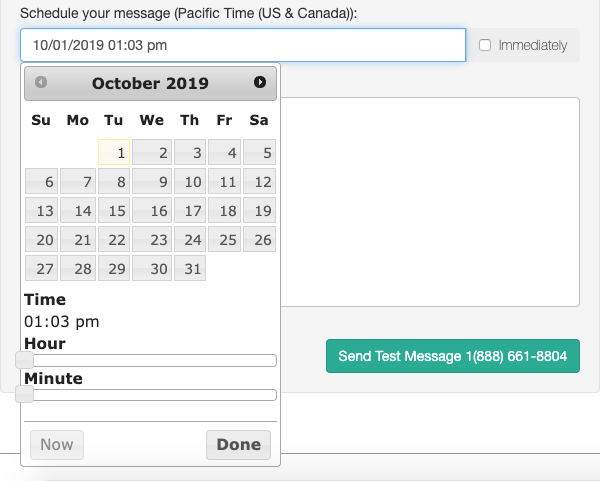
Schedule your message on the pop up calendar that appears when you click on the box or select Immediately.
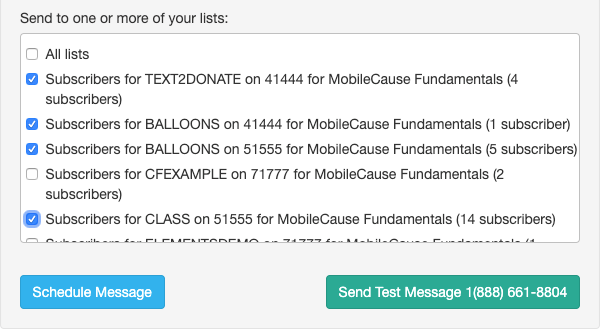
Send to one or more of your lists: Check the list or lists that you want to receive your message. These are the lists supporters listed under Communication & Marketing > Manage Lists and are defined by how they were entered: by widget, manual upload or from texting a keyword. If the subscriber was from a keyword, it will also list the shortcode used with that keyword, so you can match the list to the shortcode used above.
Note: a single supporter may appear on several of your lists. When you send the message, if the supporter is on more than one of the selected lists, they will still only receive one message; they will not be spammed with a new message from each list they are on.
Finally, click the Schedule Message button.
The Message Confirmation screen will be displayed for you to review the message before you send it. You can click cancel to go back and make changes to the message or click Confirm & Schedule in the lower right to schedule the message to be sent, or to send it right away if you set the schedule to immediately.

When you click Confirm and Schedule, you will be sent to your Scheduled area to view any messages that are not yet sent. You can edit them by clicking on the message title, or delete them from the trashcan icon.