Your dashboard will show you all of your campaigns below the account-wide analytics. Besides a quick view to see how your campaigns are doing and providing the primary way to interact with your campaigns, this is also where you can create new campaigns.
Creating a Campaign
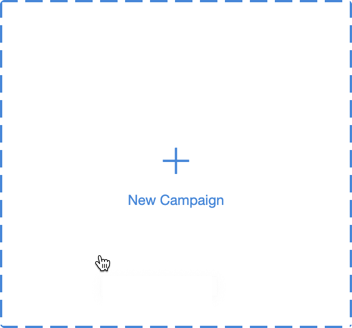
You can create a new campaign by clicking on the New Campaign button on the Dashboard on the right or by clicking on the New Campaign Tile at the end of the list of your Campaigns.

Depending on the number of campaigns you currently have, the New Campaign Tile may not be visible. It will always be the last campaign tile in your list of campaigns. Click New Campaign to start a new campaign.
The Basics (Required Items)
The main step to creating a campaign requires you to name it, determine the type of campaign and provide a description for Social Media. These are all required items.
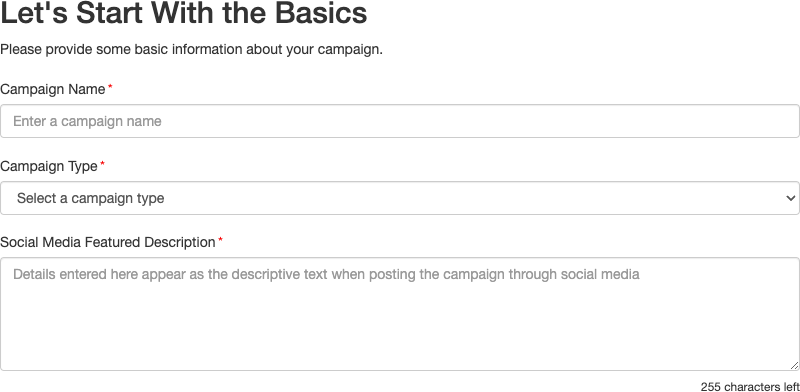
Campaign Name
The Campaign Name will appear on the Campaign Tile on your Dashboard. Along with the Social Media Featured Description, you will want a Campaign Name that is public-facing as it will be used when a link to an activity is shared from this campaign.
Campaign Type
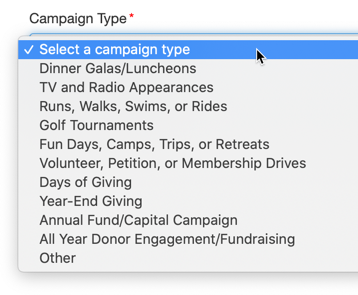
The Campaign Type is currently just for reporting purposes. Choose from the list of options, such as Dinner Galas/Luncheons, Golf Tournaments, Days of Giving, etc.
Social Media Featured Description
Enter a brief description of your campaign, whether it is just about your organization, describing your gala, your Organization's Giving Tuesday campaign, etc. You want the language to use public-facing terminology.
For example, if you paste a link to one of your Text-to-Donate activities into Facebook, Facebook will automatically find the Campaign Title and Social Media Featured Description and provide those details in the post.
Optional Information
Only the first three items are required to create a campaign, but the more information you provide in the optional section will populate activity details, such as in a Ticketing Activity or an Event Page.
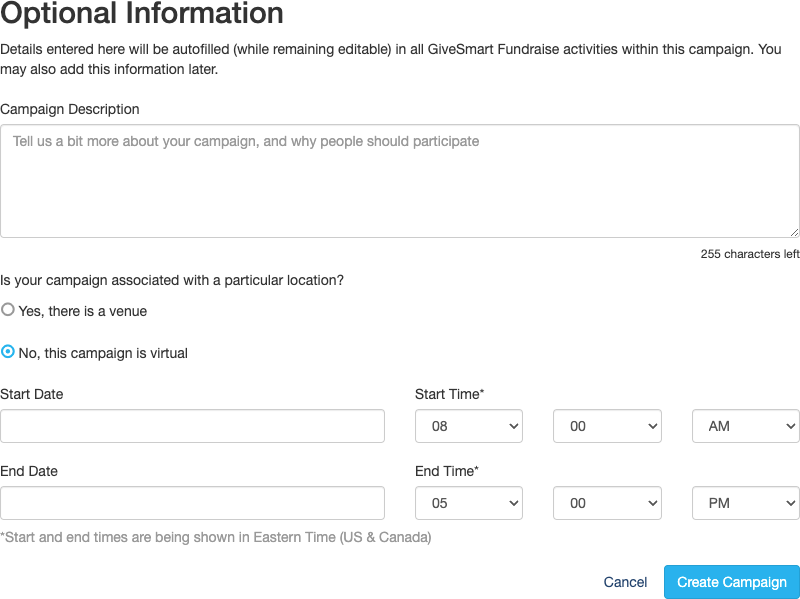
Campaign Description
Provide a description of your campaign that may carry into your various activities. This can be copied from the Social Media Featured Description if you like, or describe it differently. This description will appear on your ticketing forms and as the base description of your event page.
Location
Yes, there is a venue: If your campaign is associated with a particular location, meaning a physical location for a gala, a run/walk, etc, then you can select Yes, there is a venue. The section expands to allow you to provide the name of the location and the address. This information will generate a Google Map in your Ticketing activities so your supporters know where the activity will occur.
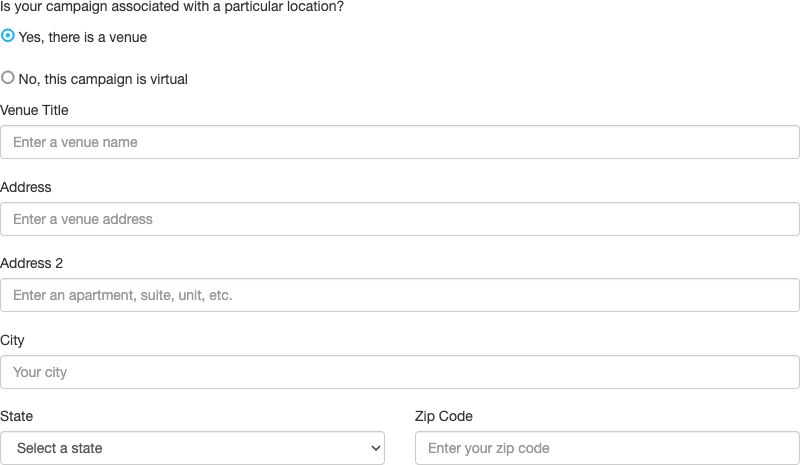
No, this campaign is virtual: If there is no physical location for your campaign, or it just doesn't apply to this type of campaign, such as on Social Media only or a Recorded or Live Streamed Virtual gala, you can select No, this campaign is virtual.
Start Date & Time / End Date & Time
This section gives you the opportunity to let your supporters know when the campaign will occur and this information will copy into various activity designs.

Finish
To complete the creation of your Campaign, click Create Campaign at the bottom right of the page.

You will be taken to your newly created campaign where you can now start adding new activities.
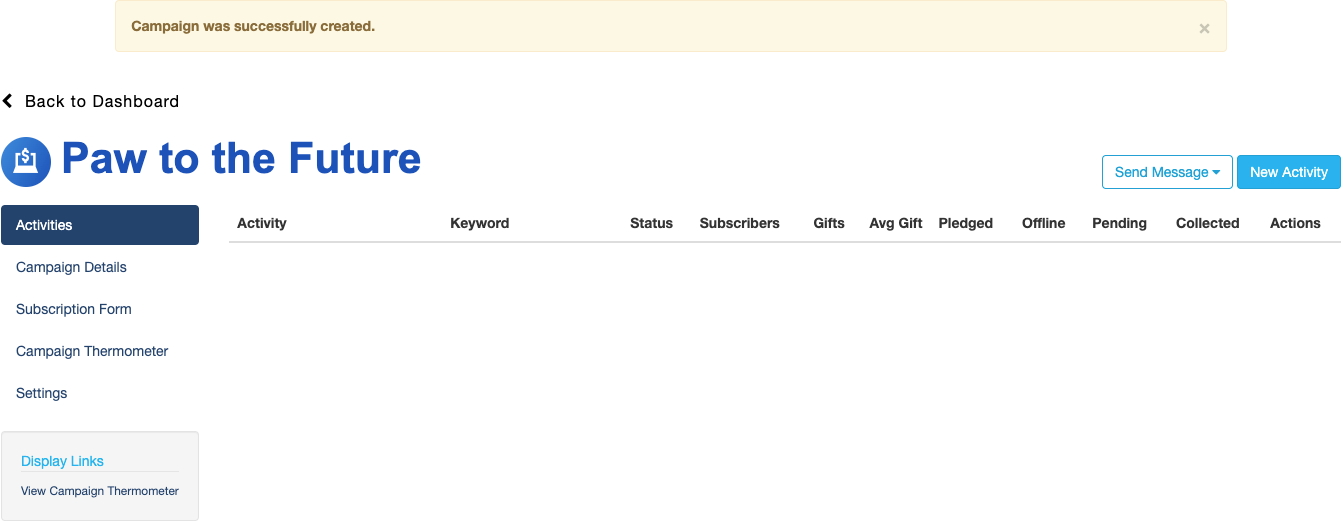
In the categories on the left, you can go back and edit the optional Campaign Details, set up a texting Subscription form to embed in your website, work with a campaign-wide thermometer and modify other Settings.