The Activity Landing Page is a standalone web page with a singular focus created specifically for an activity. Previously called the Events Page, the Activity Landing Page is where visitors land after clicking on an email, ad, web search or social media link about your event. It provides key information about the event in one location that is easy to access and view.
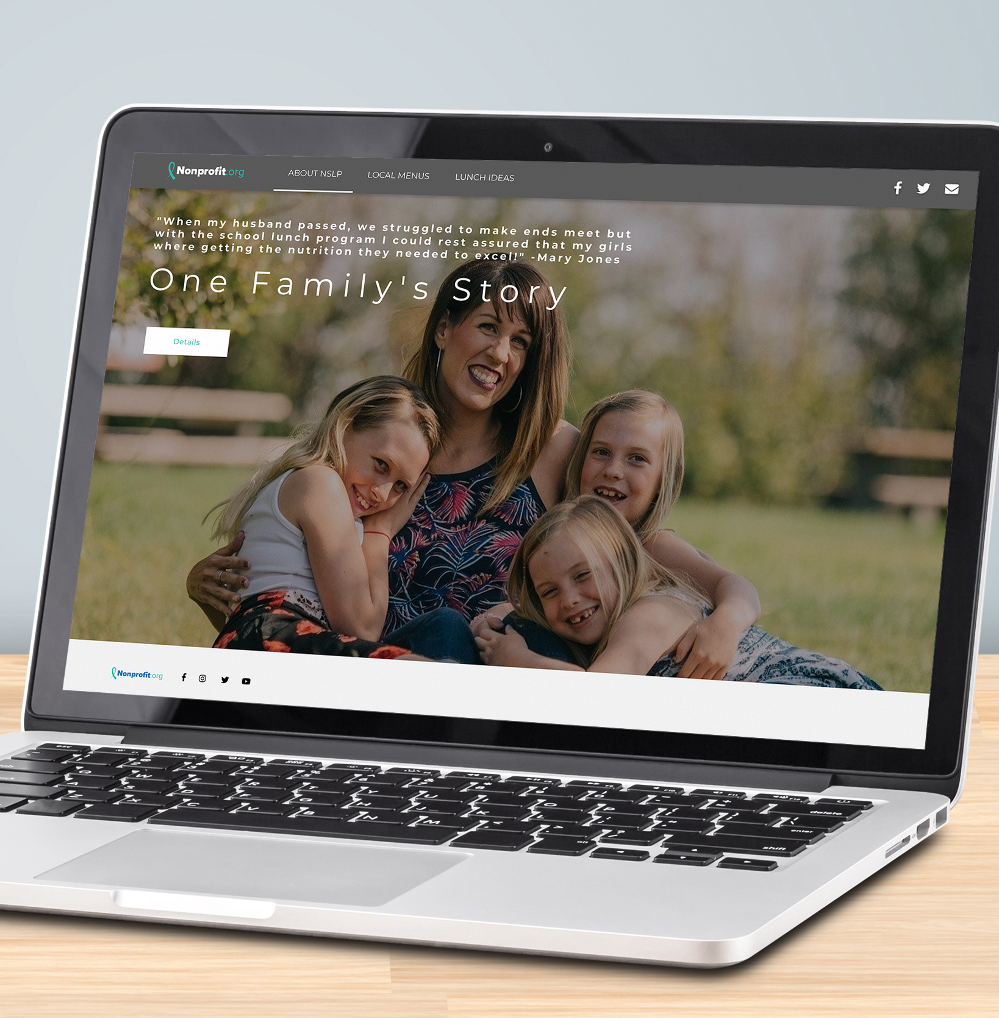
Because of its singular focus, you can tell your story to provide the impact specific to the event, where your normal website provides more of everything you do.
Designing an Activity Landing Page is as simple as editing the sections with your text and images to create a beautiful, mobile-friendly microsite with only the impactful details.
The Activity Landing Page is available in any activity you create in GiveSmart Fundraise, except for Crowdfunding and Peer-to-Peer Fundraising, which has its own Fundraising Page, and the SMS Subscription which doesn't have any pages tied to it. For a Landing Page that shows totals across multiple activities including Crowdfunding and Peer-to-Peer Fundraising, please see the Campaign Landing Page.
Creating the Activity Landing Page
Watch this Quick Start video and review the steps below.
To start, ideally, be in the main Activity you wish to use with the Activity Landing Page. While you can create an Activity Landing Page as a new activity, you will likely want to have the appropriate forms that will be showcased in the Activity Landing Page already designed.
Click on the Activity Landing Page category on the left. This will create the Activity Landing Page.
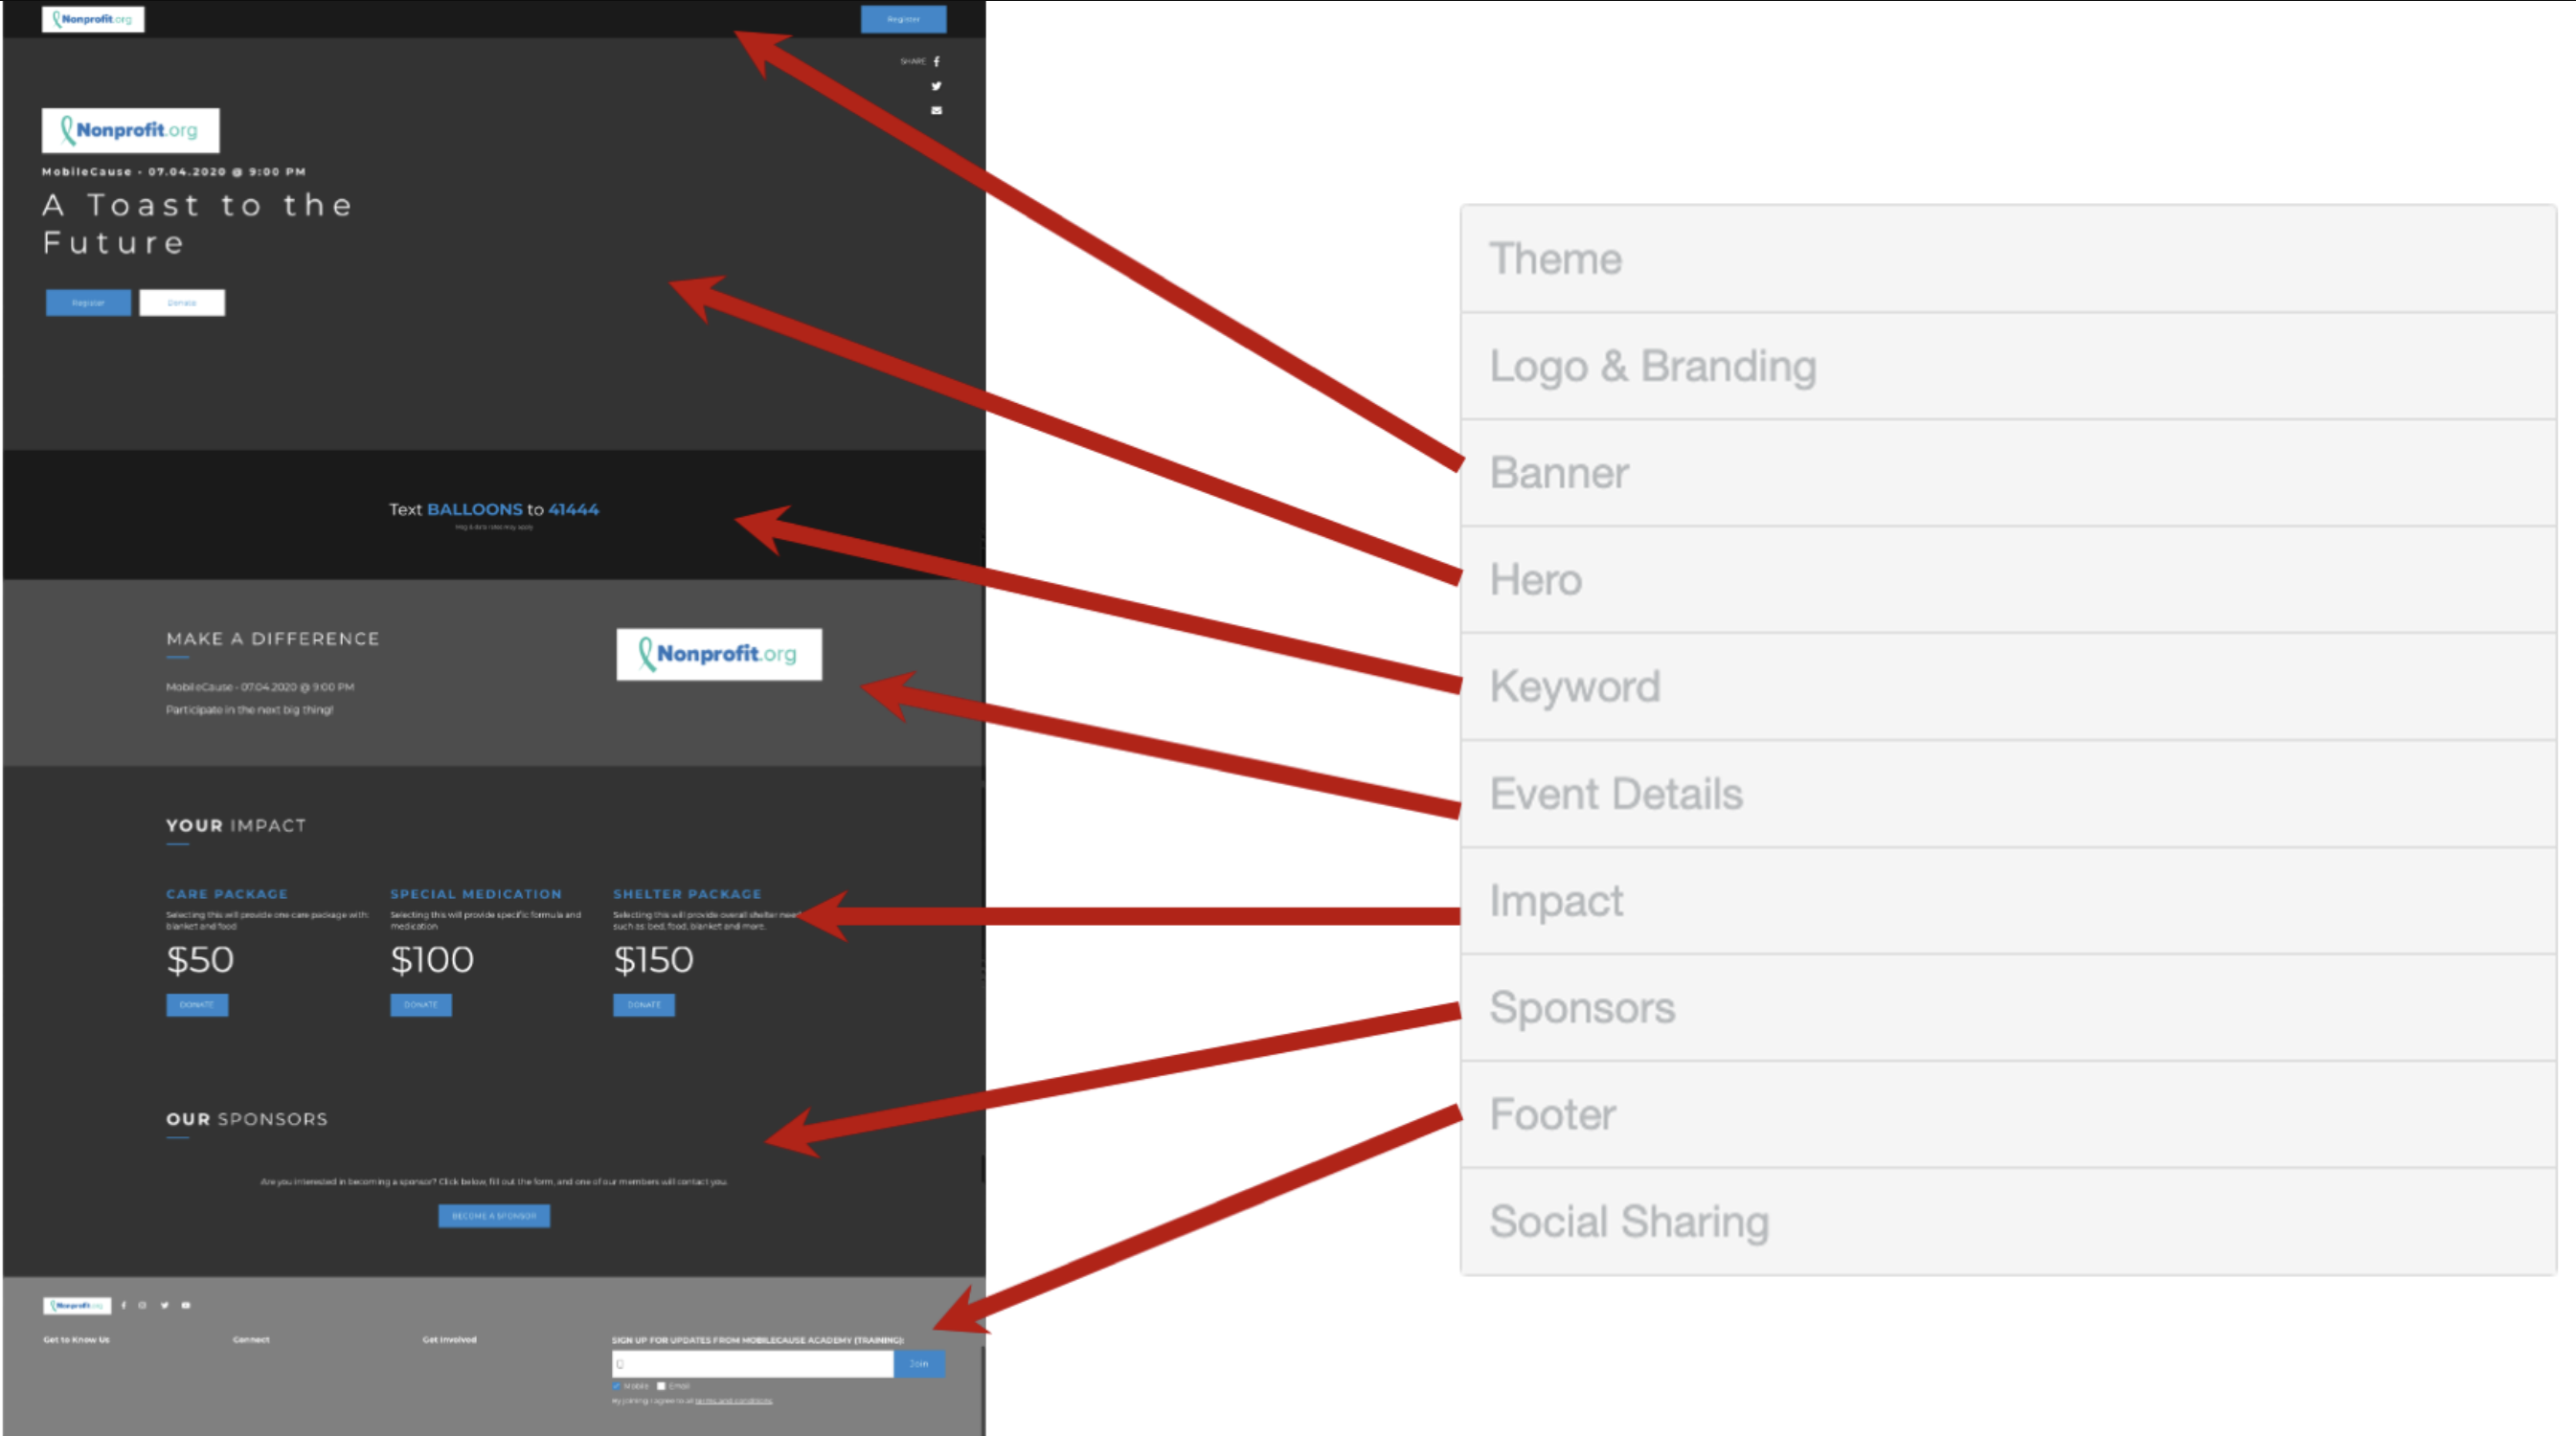
The center of your screen will show you the Activity Landing Page as you create it with the design sections to change it on the right. There are a number of things to personalize for your page as described below.
Personalizing the Activity Landing Page
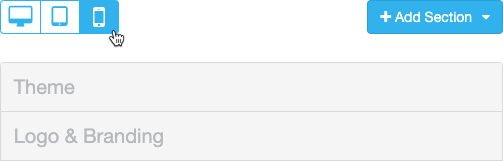
As you design your Activity Landing Page, the main display will show you what it will look like on a desktop display. To flip through examples of what it looks like in desktop, tablet and mobile views, click the icons above the sections.
Theme
You have the choice of a Dark theme, where the background colors on the page will be various shades of grey with normally white text or a Light theme, where the background colors will mostly be white with dark text or your brand color with white text or a Live Event theme which currently is the same as the Dark theme, but adds a Video Hero section to swap out with the Image Hero section. The Video Hero includes a progress section and donor wall, perfect for virtual events.
Logo & Branding
Like virtually every Logo & Branding section in GiveSmart Fundraise, you can change the Brand Logo, Color and Background Color here. The Logo initially appears in the Banner, Hero, Event Details and Footer sections. Changing the logo here will change it for the entire page.
Banner
The Banner stays visible as you scroll through the page and can include a logo, different navigation links and a primary action button (that is configured in the Hero section).
Hero (Image Hero / Video Hero)
The Hero section contains a hero image (or carousel of images) or a video (including livestreams), prominently placed on the page. The Hero (or section) is often the first visual element seen on the page. It provides the most important and impactful information for the page. Add image(s) or video, a logo image, title for the Event and different action buttons, such as registration/tickets, Donation and Event Details.
Detailed Live Event Section Info
Keyword
Framed in it's own section, you can prominently display the Keyword and Shortcode for supporters to share. While they can always share the link and use social sharing, providing the keyword here allows for something that is easily remembered when they're talking about you with others.
Event Details
This section is used to more fully describe the event. It will automatically include the information from the Campaign's Event Details, as described here.
Impact
The Impact section provides additional Action Items for your supporters. Often this is used to include up to four levels of donations with room to describe what that level of donation will do for the organization.
Sponsors
Show off your sponsors. Include a button to become a sponsor. Link from the Sponsor's logo to go to their page.
Footer
Include your contact information with Social Media follow links, Sign Up links and information links as desired.
Social Sharing
Social sharing gives your supporters a method to directly share your event with their contacts. The desktop and tablet displays will show the share options in the Hero image initially, but as you scroll down, or if you access the page from a mobile device, the social share options will appear in the Banner. You can personalize the initial messages to send for Facebook, Twitter, Text and Email.
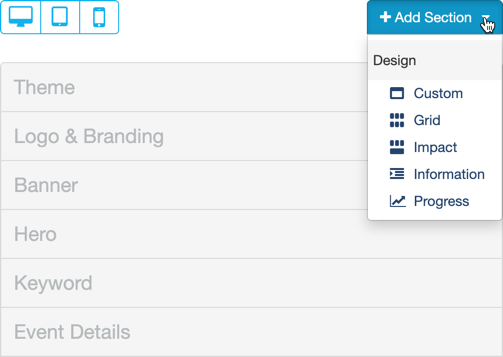
Adding Sections
If you need more for our Activity Landing Page, you can click on the Add Section button at the top of the sections and add custom sections or a new Grid, Hero, Impact or Information type of section. Make sure when you add it, to also place it in the proper location in the list of sections.
Accessing the Activity Landing Page
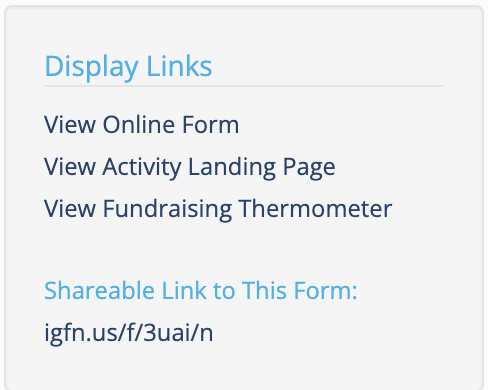
Activity Landing Page Display Link
The link to the Activity Landing Page is in the Display Links section on the left. Click on View Activity Landing Page to display the Activity Landing Page in a new window. This is the link you can share to your supporters in email, social media and more.
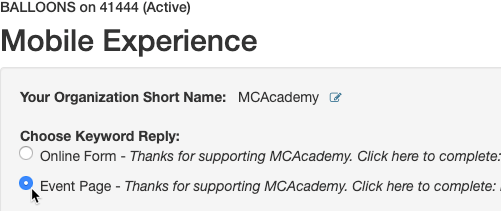
Mobile Experience
If you wish the texting component to your campaign's communication to drive your supporters to the Activity Page, then you can set the Keyword to go directly to the Activity Landing Page by changing it in the Mobile Experience category on the left.

When you create an activity, the main "Online Form" will be the default link shared through texting the Keyword, but it can be changed to any other form created in this activity, including the Activity Landing Page.
QR Code
The QR Code that is available with your forms is not directly available (within the Activity) for the Activity Landing Page. But you can create a Custom Link at the Account Level as described here.
