For a run/walk or for any other form, you can include a Agree to Terms Form Element checkbox in its own section, to link to a page on your website with the details of the terms and conditions.
To add the Agree to Terms, you may want to create its own Section, as outlined here.
Then simply select it from the Add Form Element button in (any of) the Section.
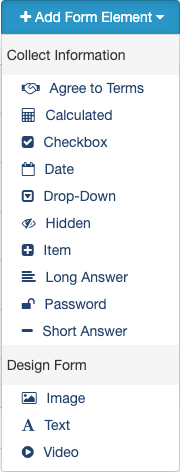
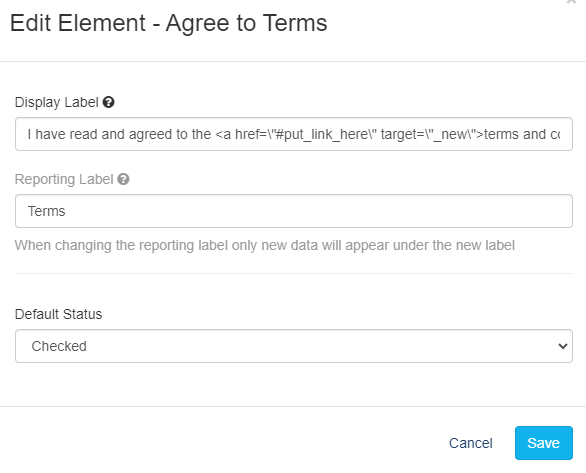
You will be presented with the Add Form Element - Agree to Terms option.

Display Label
This form element starts with some standard language, written partially in HTML:
| I have read and agreed to the <a href=\"#put_link_here\" target=\"_new\">terms and conditions.</a> |
All you will need to do is enter the link to your terms and conditions page between quotes and decide if you want it to open in a new tab or window.
Adding target="_blank" will open the link in a new window or tab. Without it, the link will open in the same window, meaning your form will not be open anymore. This is probably a good addition so the supporter doesn't lose their filled-in information on the form.
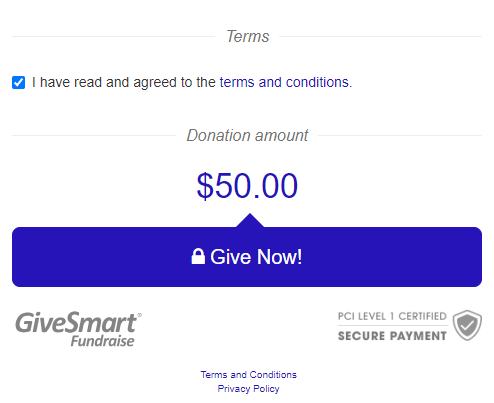
| Example of a correctly edited Display Label: I have read and agreed to the <a href="https://www.givesmart.com/privacy-policy/" target="_blank">terms and conditions.</a> This will display and work like the following: I have read and agreed to the terms and conditions. |
Reporting Label
Because of the length of the Display Label, it would be a good idea to have a separate & simple Reporting Label.
- Click edit in the Reporting Label line and it should open up with "Terms" for the label.
- You can use the word Terms or change it.
Default Status
By default, the status for the checkbox is clicked, meaning, when your supporter first comes to the form, they are automatically agreeing to the terms. If you would prefer to switch it to Unchecked by default, use the drop-down menu to select the Default Status you desire.
Click Save when you are done personalizing the element and it will be added to the form.