Once you've created your Ticketing Activity, you may be managing your guest list, but at your event, you will want to check those guests in with their tickets!
Getting to Guest Check In
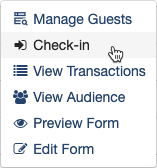
Start in your campaign.

Use the action menu to the right of your Ticketing form and select Check-In.
Manually Finding/Checking in Guests
You can check in the Guests manually by finding them from the list.
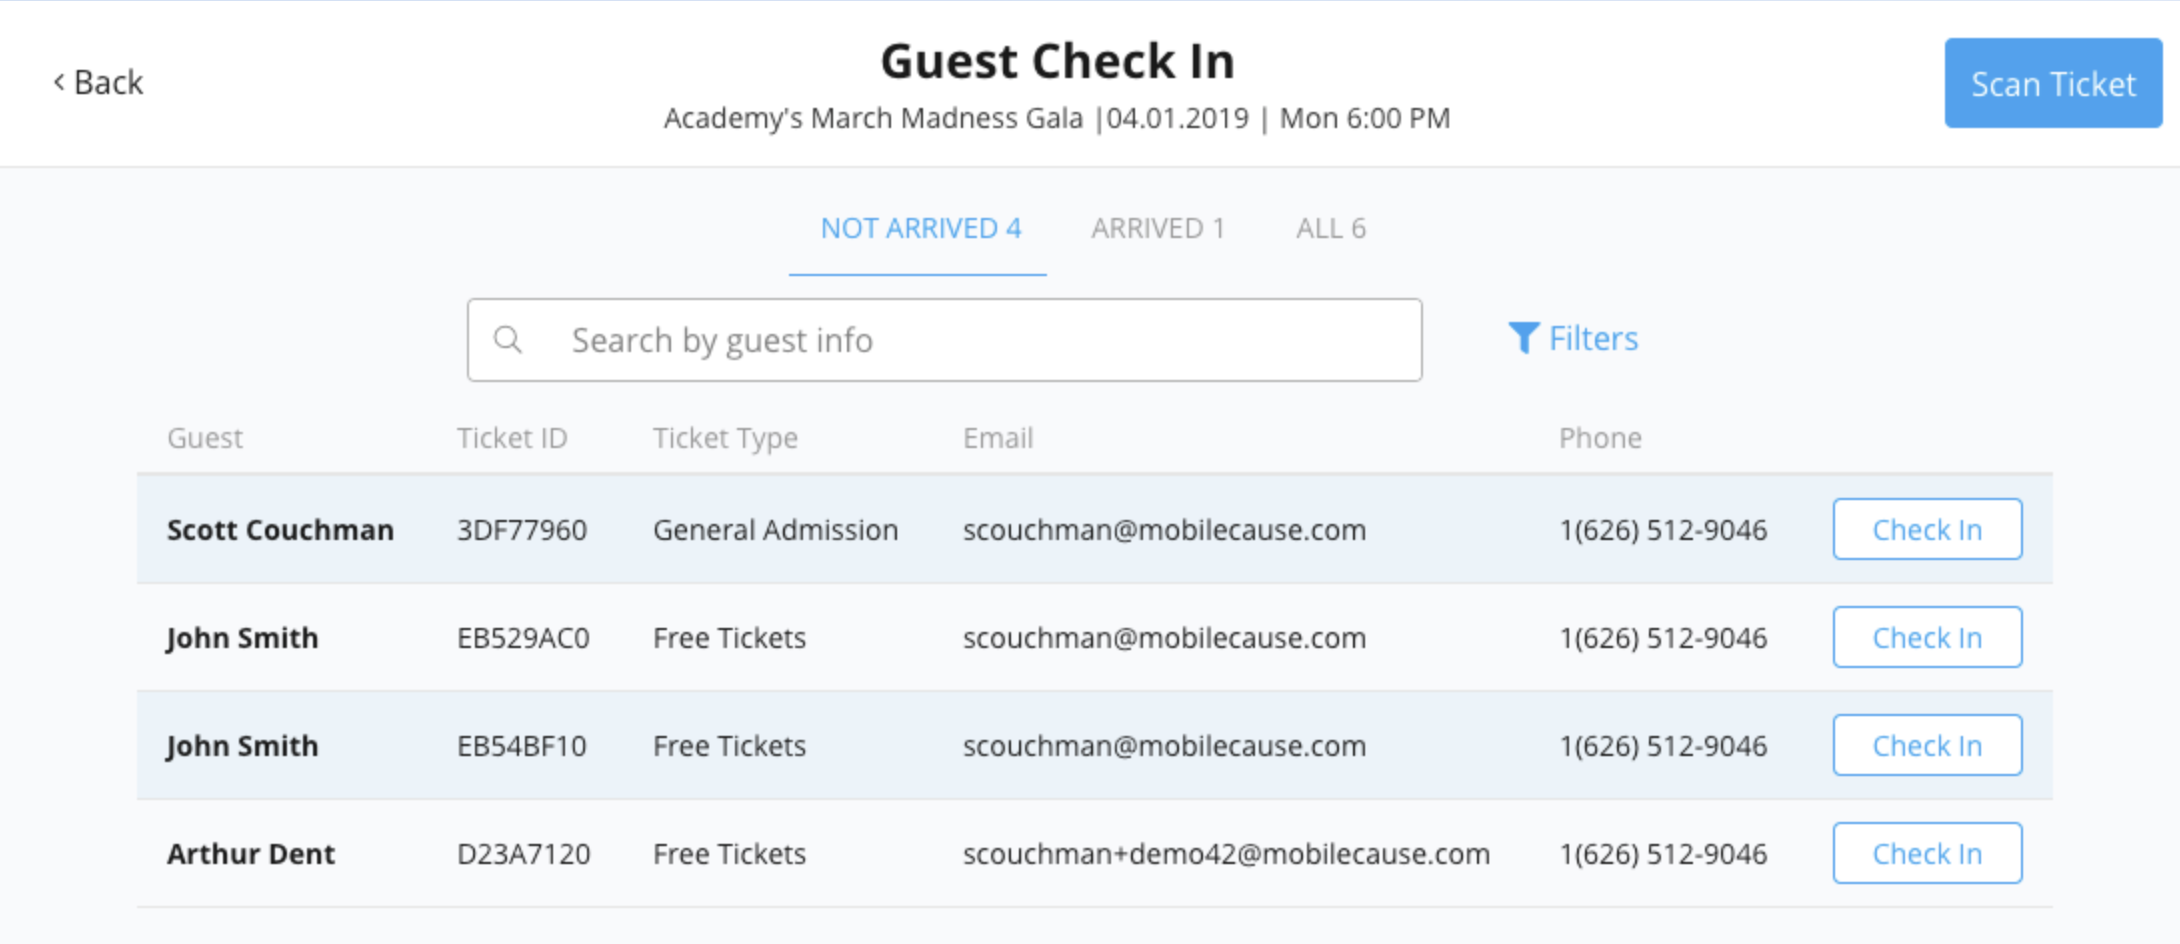
If you want to look for a specific guest, you can use the search box above the guest list to search by any of the items shown on the screen:
- Name
- Ticket ID
- Ticket Type
- Phone

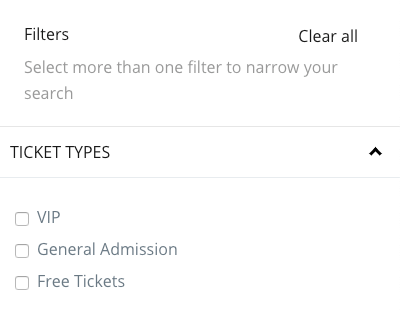
You can also use the Filter button to the right of the search box to narrow the list first by ticket type before you search.
Find All Guests in a Party
When one guest purchases a number of tickets, they can put the names of each guest on each ticket, or leave it so their name appears on all the tickets, as described here. However it is done, several people in the purchaser's party may arrive at the same time. To make the check in process faster, you can quickly narrow the list to those in the purchaser's party.
These groups of tickets can be identified by the group of people icon to the right of the name. Click on this link to filter the list to only those tickets bought by one party.

Then you will see only the names and ticket IDs for everyone in that party, so you can check them in faster.
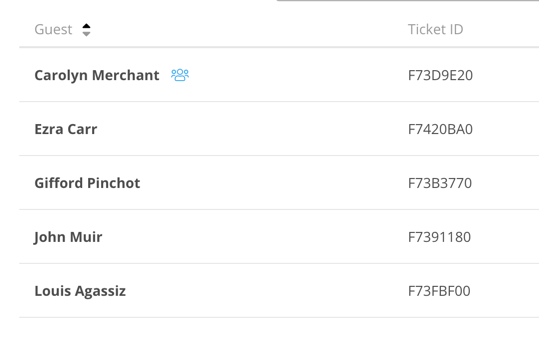
While you can select anyone in the party to filter this list, the first person on the list will be the purchaser.
Checking In Guests
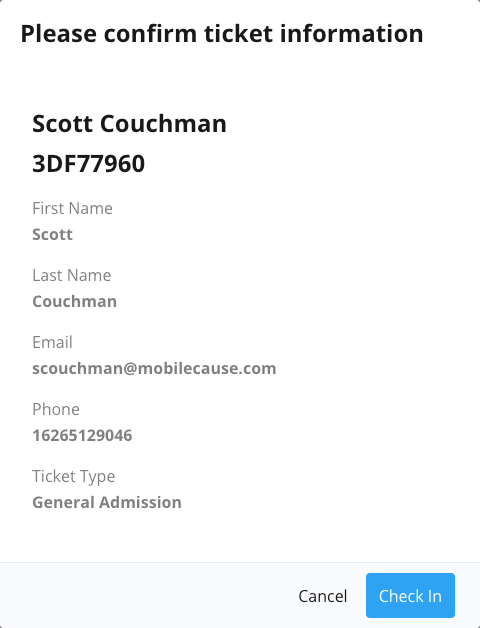
Click Check In by the found name/ticket.
It will give you a verify screen that you can double check the name/ticket number, etc. click Check In to continue.
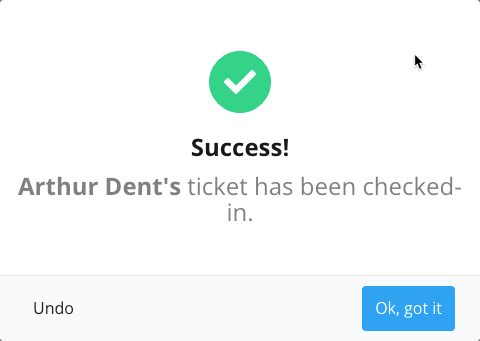
You will then get a Successful Check-in screen where you can close by clicking Ok, got it. 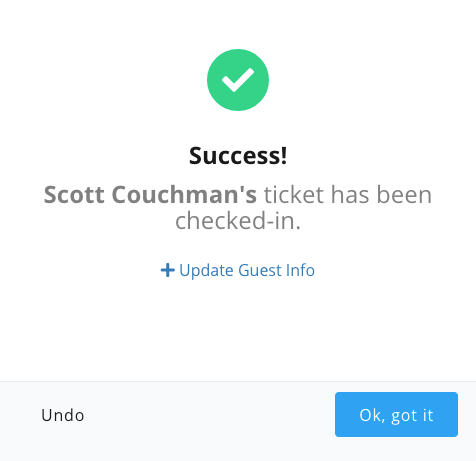
Update Guest Info
You can also click Update Guest Info to change the Guest's Name, Mobile Number, and Email. If you have enabled the setting to Save guest payment info on file, you can also add their credit card information, as explained here.

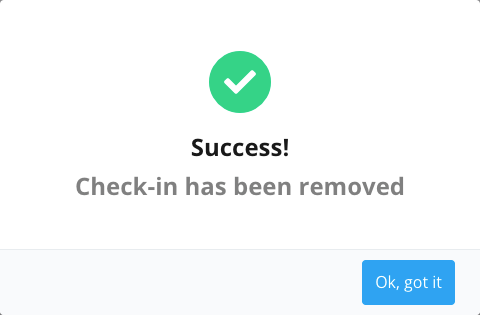
Undoing a Check-in
If you clicked on the wrong ticket, you can click Undo from the Success screen, or Cancel from the previous screen to stop the check-in process. If you click Undo, it will inform you that the Check-in has been removed.
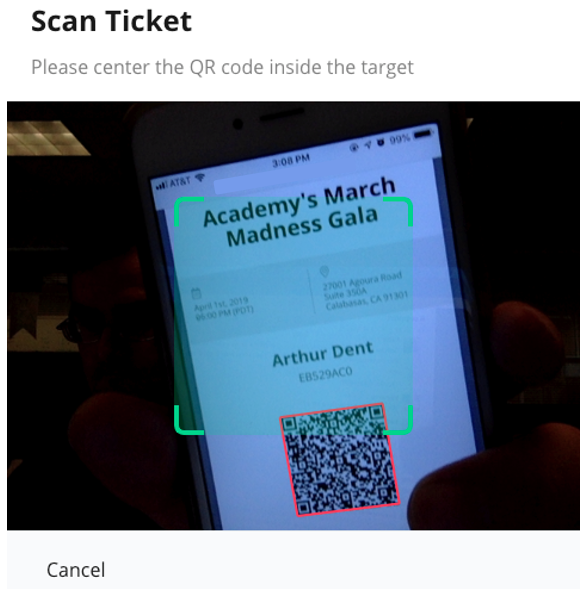
Scan Tickets with the QR Code
You can also use the camera on your laptop, tablet or phone to check in a guest with the QR code on their ticket using the Scan Ticket button in the upper right of the Check-In page.
With the camera on, show the ticket to your camera, aiming to put the code between the brackets. When the application detects the QR code, the brackets will turn green and the image of the detected QR Code will turn red.
A moment later, it will indicate that the guest is checked in and you can click Ok, got it to close the message.
If you made a mistake you can click Undo to stop the check-in and Ok, got it to close the Undo message.